Description
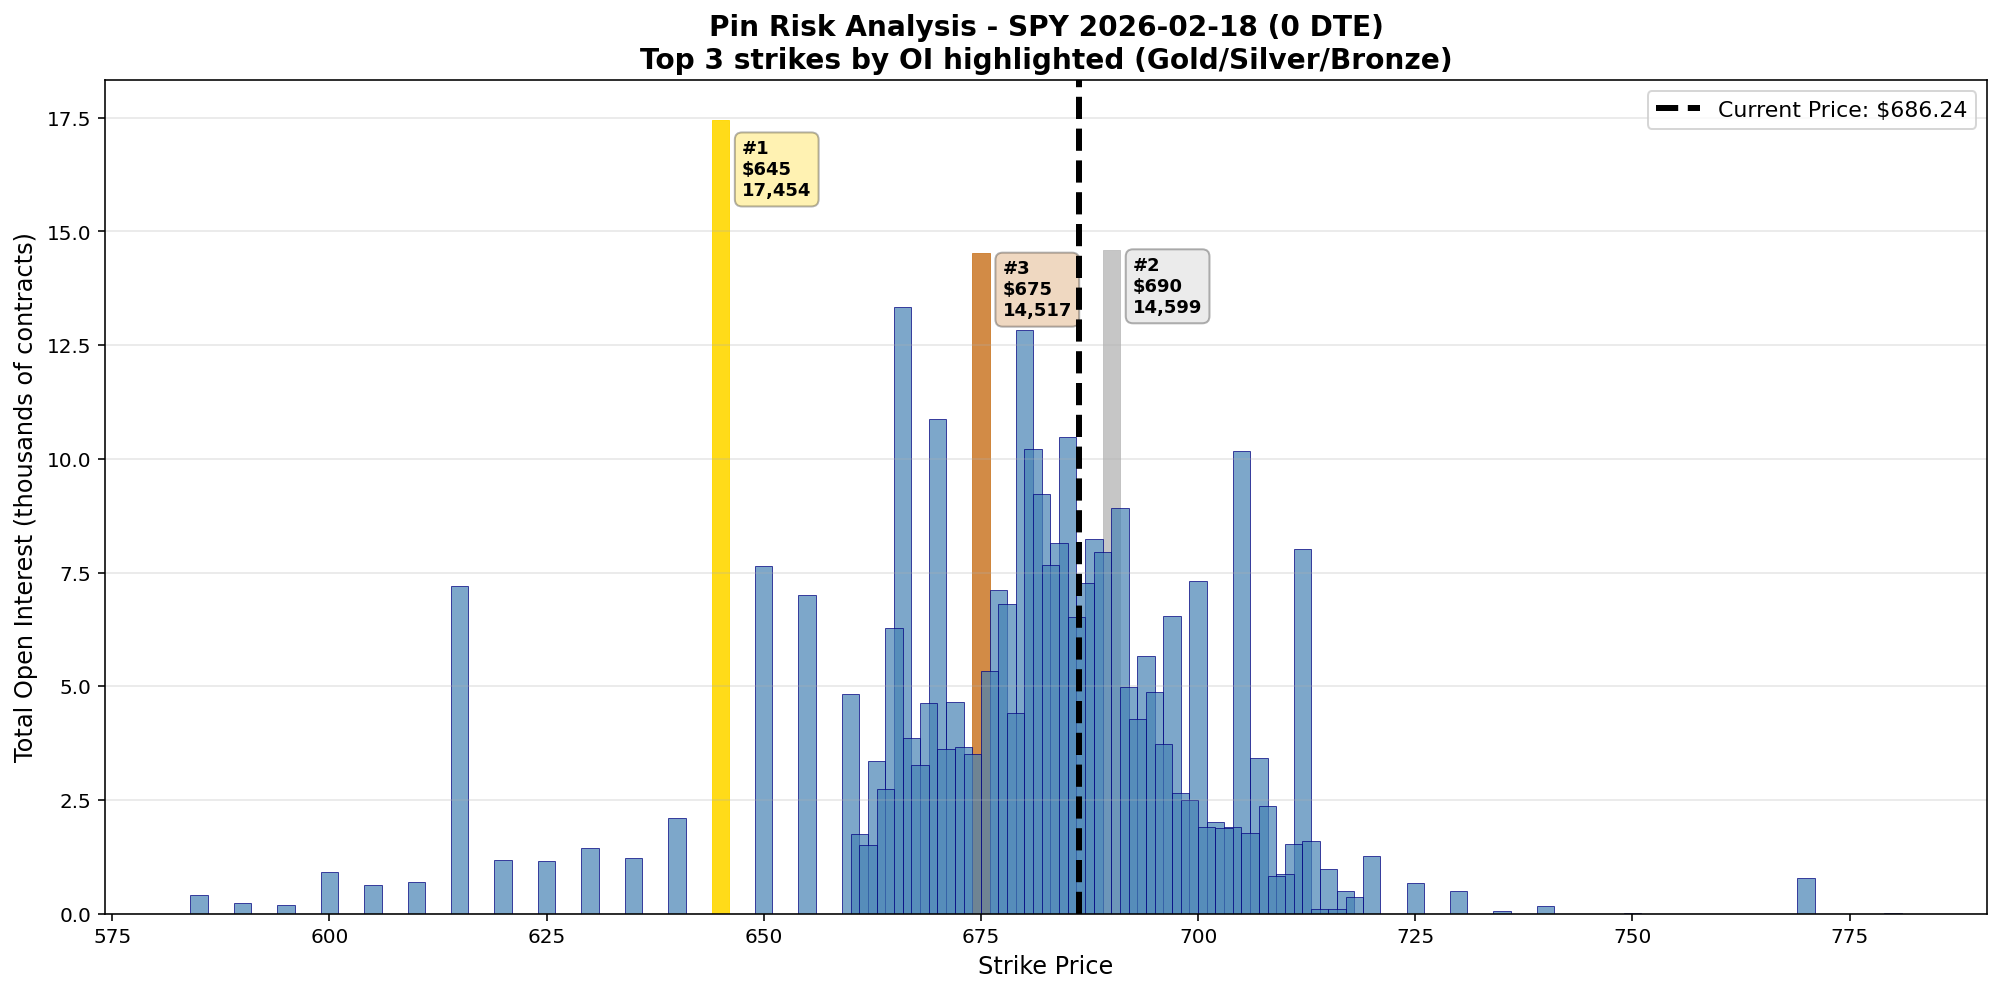
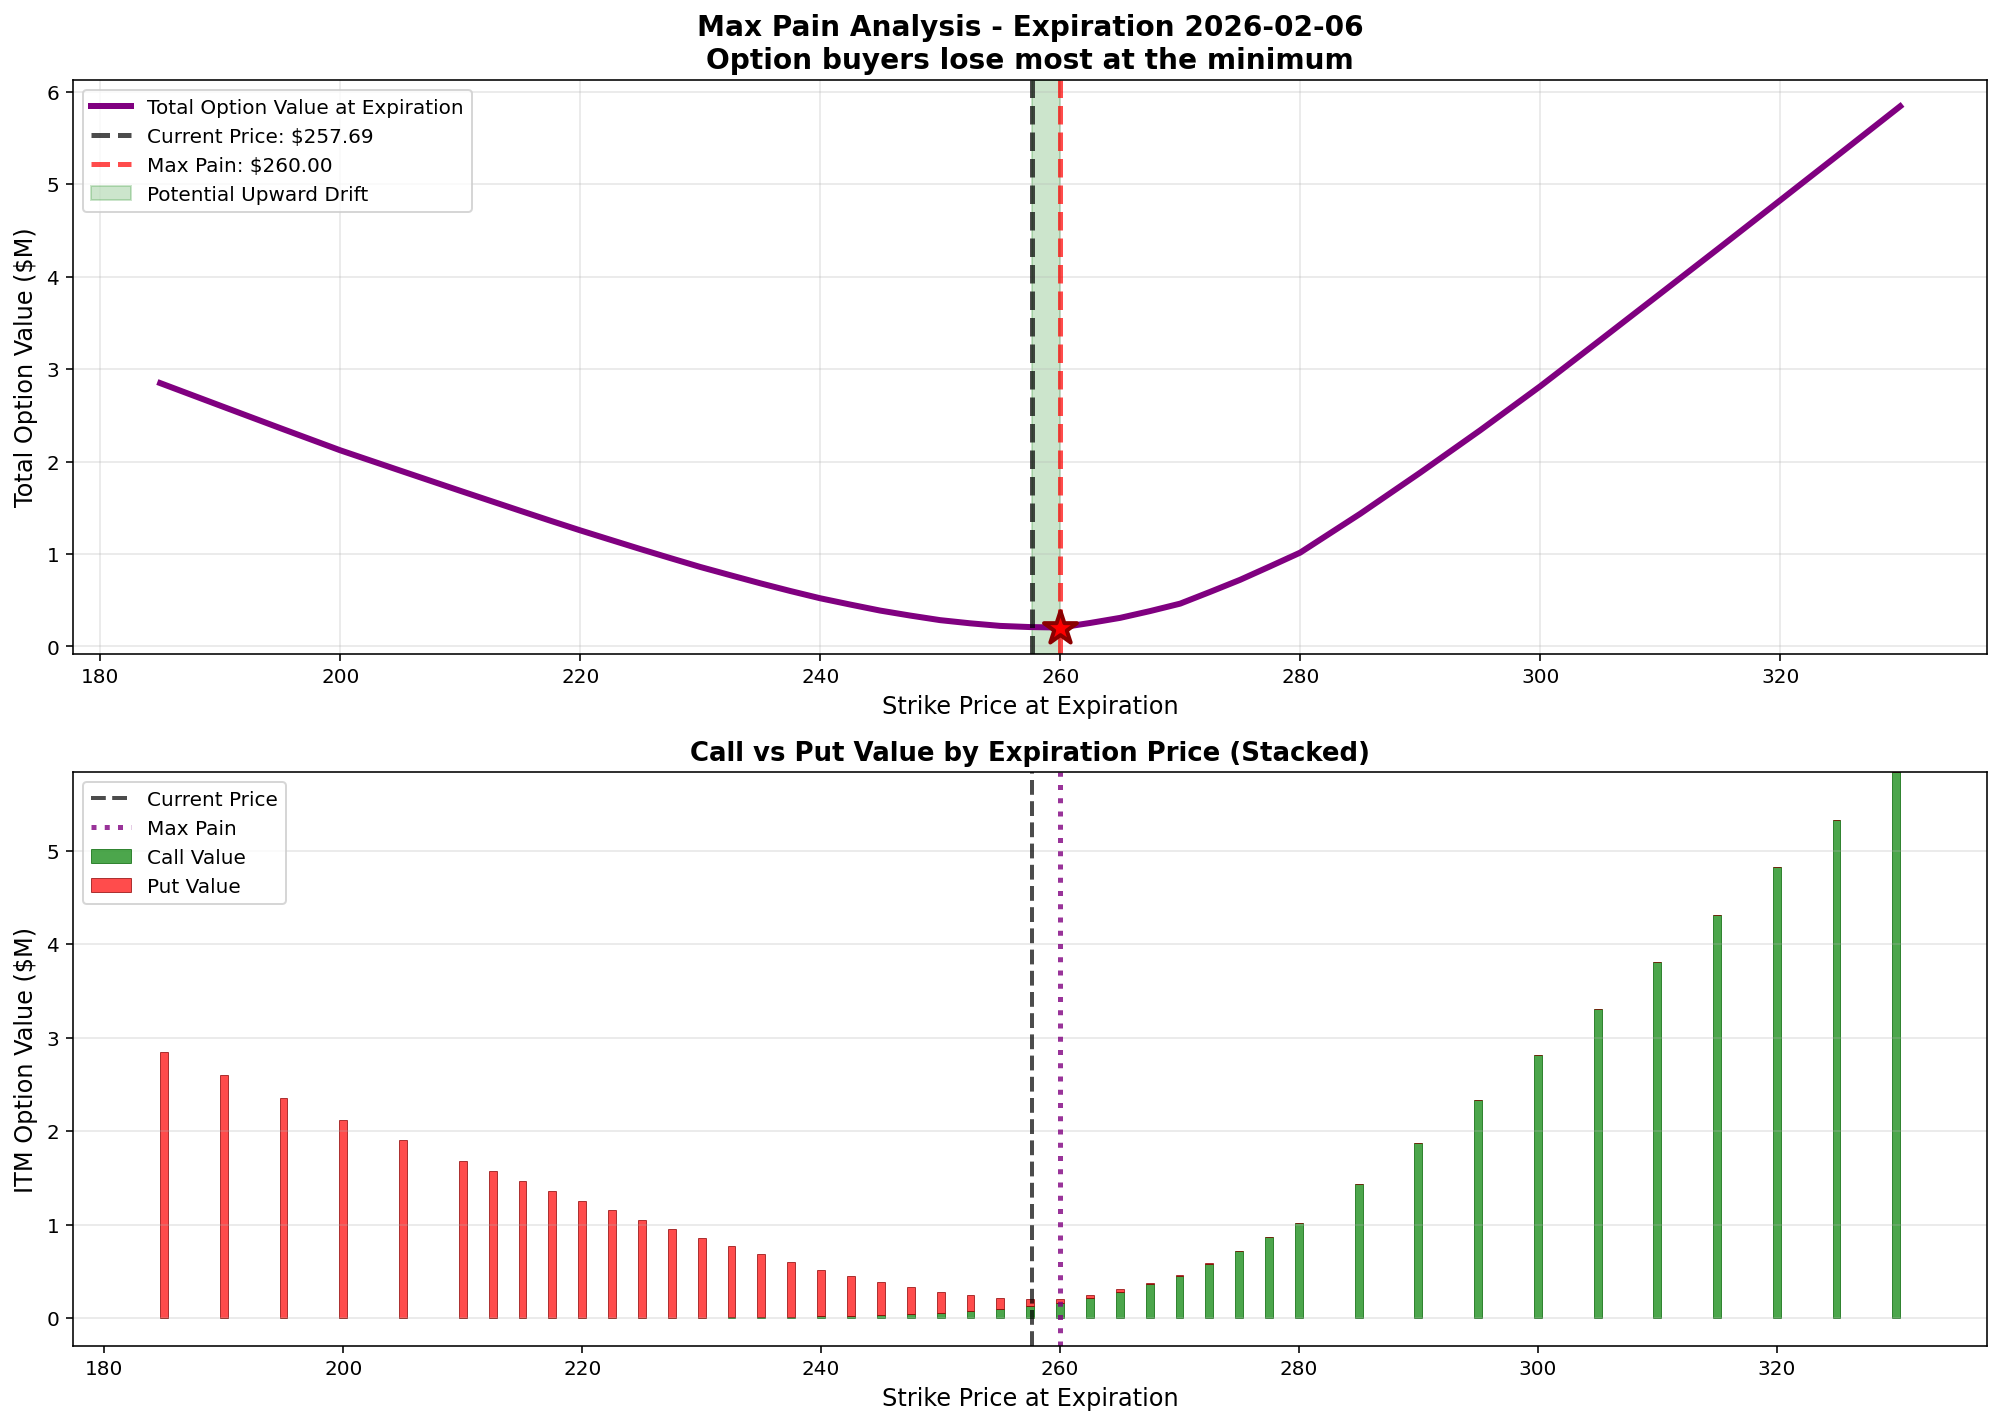
In my previous series of articles on (Pin Risk and Max Pain), we explored how massive open interest at specific strikes creates gravitational forces that pull stock prices toward those levels near expiration. We saw how dealer gamma hedging — the mechanical necessity of market makers rebalancing billions in exposure — creates observable pinning behavior every Friday.
But understanding what pinning is and understanding how to trade it are two different things.
Most options traders acknowledge that pin risk exists, then proceed to ignore it when placing trades. They sell the $600 put because it has the best premium, without checking that $600 has 75,000 contracts of open interest with 2 days until expiration. They wonder why the price drifts exactly to their short strike and stays there, maximizing their loss.
This post is about implementation — the practical rules, decision trees, and position management strategies you need to trade with pin risk rather than against it. We’ll cover:
- Strike selection criteria for premium sellers
- Iron Condor on SPY
This is where theory becomes practice. Let’s build a systematic framework for trading around pinning behavior.
Strike Selection for Premium Sellers
When you sell premium — iron condors, credit spreads, naked options — your short strike is where you’re most vulnerable. If the price closes at that strike on expiration, you face maximum assignment risk and potential loss.
Pin risk makes this worse. If you accidentally sell at a high-OI concentration strike near expiration, you’re not just hoping price stays away — you’re fighting dealer hedging flows that actively pull price toward your short strike.
The DO List
1) Always check the top 3 OI strikes before selecting shorts
Before placing any premium-selling trade, run this check:
# Get top 3 OI strikes
top_oi_strikes = total_oi_by_strike.head(3)['strike'].tolist()
print(f"Avoid these strikes: {top_oi_strikes}")

# Your proposed short strikes
my_short_put = 595
my_short_call = 605

# Check distance
for strike in top_oi_strikes:
    if abs(strike - my_short_put) < 2.5:
        print(f"⚠️ WARNING: Short put ${my_short_put} is too close to pin zone ${strike}")
    if abs(strike - my_short_call) < 2.5:
        print(f"⚠️ WARNING: Short call ${my_short_call} is too close to pin zone ${strike}")
This takes 30 seconds and can save you from disaster.
2) Sell strikes AWAY from high-OI concentration zones
General rule: Keep at least $2.50-$5 buffer from top-3 OI strikes when within 5 DTE.
Good Example:
- SPY at $600
- Top OI at $600 (75k), $595 (45k), $605 (38k)
- You sell: $592.50 put / $607.50 call
- Buffer: $2.50 on each side
Bad Example:
- SPY at $600
- Top OI at $600 (75k)
- You sell: $600 put or $600 call
- You just bet against the most powerful pinning force in the chain
3) Use pin risk as a filter, not your primary criterion
Pin risk doesn’t tell you where to sell — it tells you where not to sell.
Your primary criteria should still be:
- Expected move/probability analysis
- Technical support/resistance levels
- Your directional bias
- Premium received vs. risk
Pin risk is the final check: “Given my chosen strikes, am I accidentally selling at a pin zone?” If yes, shift strikes by $2.50 to $5 to create a buffer.
The DON’T List
1) Never sell premium AT the highest OI strike within 3 DTE
This is the cardinal sin of options trading near expiration.
Why it’s so bad:
- You have maximum exposure where pinning is most likely
- If pinning occurs, you’re at max pain (literally)
- Assignment risk is highest
- You’re fighting billions in dealer hedging flows
Exception: You’re explicitly exploiting pinning (covered later in “Advanced Strategies”)
2) Don’t ignore concentration metrics when close to expiration
The OI concentration percentage matters:
- >20% at one strike: EXTREME pin risk — avoid entirely
- 15-20% at one strike: HIGH pin risk — keep $5+ buffer
- 10-15% at one strike: MODERATE pin risk — keep $2.50+ buffer
- <10% at one strike: LOW pin risk — normal trading
Calculate it:
top_strike_oi = total_oi_by_strike.iloc[0]['total_oi']
total_oi = total_oi_by_strike['total_oi'].sum()
concentration = (top_strike_oi / total_oi) * 100
print(f"OI Concentration: {concentration:.1f}%")
3) Don’t assume high OI always means pinning
Three conditions must align for pinning:
- High OI concentration at specific strike (>15%)
- Low DTE (<5 days, ideally <3)
- Proximity (current price within 2% of strike)
Without all three, pinning is unlikely:
- High OI but 30 DTE → gamma too low
- High OI but 10% away from spot → too far to matter
- Moderate OI even at 1 DTE → not enough concentration
Iron Condor Strike Selection
Let me walk you through exactly how I’d approach this trade.
The Situation: It’s Monday morning. SPY is sitting at $600.00, and I want to sell an iron condor for Friday expiration. I’ve got 4 days to work with, which seems reasonable. But before I start looking at premiums, I need to check the pin risk landscape.
Step 1: Check the OI Distribution
I pull up the option chain and immediately look at where the big money is positioned:
# Top 5 OI strikes - this is what I see:
#1: $600.00 (75,000 contracts) - 20.5% concentration
#2: $595.00 (45,000 contracts) - 12.3% concentration
#3: $605.00 (38,000 contracts) - 10.4% concentration
#4: $590.00 (22,000 contracts) - 6.0% concentration
#5: $610.00 (20,000 contracts) - 5.5% concentration
My immediate reaction: “Uh oh. That $600 strike is a monster.”
75,000 contracts at exactly where SPY is trading? With only 4 days left? That’s over 20% of all open interest in a single strike. This is screaming pin risk.
Step 2: Categorize the Risk Zones
Now I’m thinking like a dealer who has to hedge this exposure:
- $600 = DANGER ZONE: 20.5% concentration, right at the money, with 4 DTE. If I sell anything here, I’m basically betting against the entire dealer community.
- $595 = Still sketchy: 12.3% concentration and only $5 (0.8%) away from the current price. Close enough to matter.
- $605 = Moderate concern: 10.4% concentration and also only 0.8% away. Not as bad as $600, but still a decent-sized magnet.
- $590/$610 = Much safer: Both are far enough away that pinning would require a significant move.
Step 3: Strike Selection Reality Check
Here’s where most traders mess up. They see the premiums and get excited:
What I’m tempted to do (but won’t): ❌ The “Greedy” Iron Condor: 595/600/605/610
Looking at the premiums, this structure probably pays around $2.50-3.00. Tempting! But let me think through what could go wrong:
- Short put at $600 = I’m literally selling at the biggest pin magnet in the entire chain
- Short call at $605 = Also at a concentration zone
- If SPY pins at $600 (which is likely), my short put gets tested, and I face assignment
- Even if I don’t get assigned, I’m holding maximum risk right at the pin zone
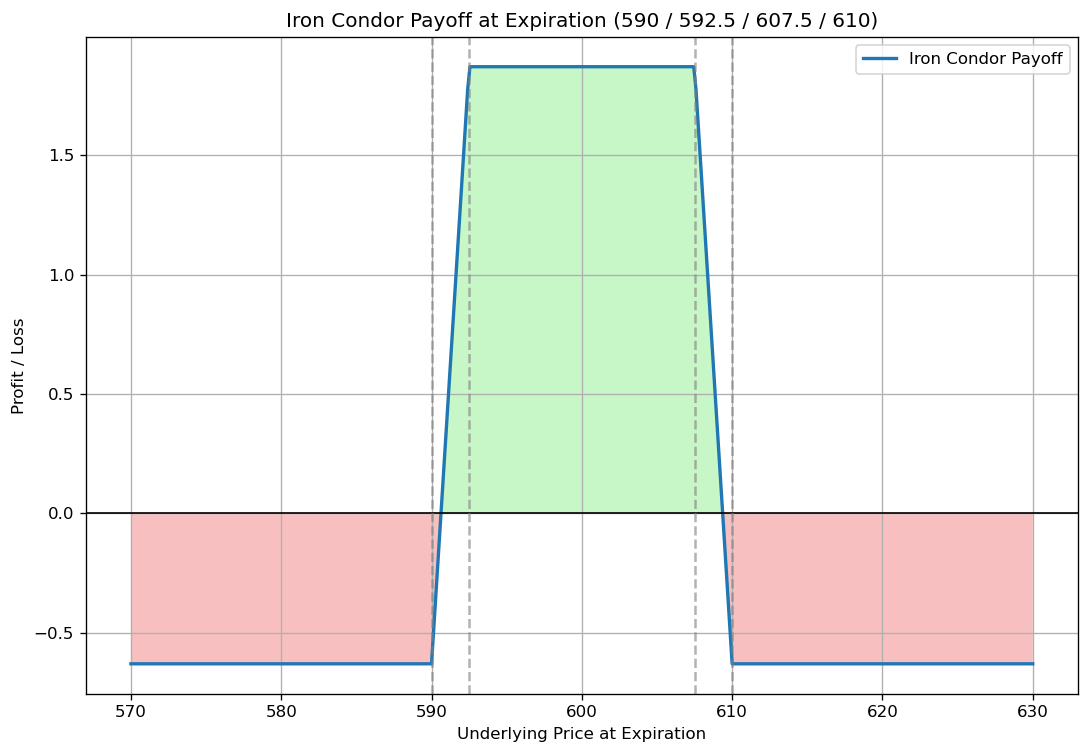
What I actually do: ✓ The “Smart” Iron Condor: 590/592.50/607.50/610
This pays less — maybe $1.75-2.25 — but look at the risk profile:
- Short put at $592.50 = $2.50 cushion below the $595 zone, $7.50 below the monster $600 level
- Short call at $607.50 = $2.50 above the $605 zone, $7.50 above the $600 monster
- Even if some pinning happens at $595 or $605, I’m outside the blast radius
Or if I want to be really conservative: ✓ The “Sleep Well” Iron Condor: 587.50/590/610/612.50
This probably only pays $1.25-1.75, but it’s almost bulletproof against pin risk. All the major concentration zones are well inside my shorts.
The Internal Debate:
Here’s the conversation happening in my head:
Greedy Brain: “But the $600 strike has the best premium! That’s where the money is!”
Risk Management Brain: “Yeah, and there’s a reason for that. 75,000 contracts didn’t accumulate there by accident. Do you really want to bet against the force that’s going to be hedging $7.5 billion in exposure?”
Practical Brain: “Look, you can make $175 on the safe trade or potentially lose $500 on the greedy trade. Which one helps you sleep at night?”
The Decision:
I go with the 590/592.50/607.50/610 structure. Here’s my thinking:
- I’m still collecting decent premium ($200 per contract)
- My probability of profit is much higher
- I can actually manage this trade instead of just hoping
- If SPY does pin at $600, I’m safely outside the chaos
What Actually Happened (Hypothetically):
Let’s say I placed both trades to see the difference:
Monday: Collected $300 on the greedy version, $200 on the smart version Tuesday-Thursday: SPY drifts around $599-601, nothing dramatic Friday morning: SPY at $600.20, clearly in the pin zone Friday 3:30 PM: SPY pinning hard at $600.05
Greedy trade result: Short $600 put is basically ATM, facing assignment, sweating bullets Smart trade result: Watching from a safe distance, likely closing for 80% profit
The Lesson:
Pin risk isn’t about being right or wrong about market direction. It’s about recognizing where the structural forces are and positioning yourself accordingly. The extra $100 in premium from the greedy trade wasn’t worth the stress and risk of fighting a 75,000-contract pin magnet.
Sometimes the best trade is the boring one.
Final Thoughts
Pin risk is not voodoo — it’s applied market microstructure. Dealer gamma hedging creates observable, tradable patterns. The traders who systematically incorporate these patterns into strike selection and position management gain an edge over those who ignore them.
This is the mindset behind The Quantitative Edge — simple ideas, implemented cleanly, that scale into powerful tools for data-driven trading.
Statemi bene!